I’ve seen countless breathtaking photos of the aurora borealis, but nothing can prepare you for the surreal experience of witnessing it firsthand. As I stood under the starry sky, waiting for the lights to appear, I felt a mix of excitement and uncertainty. What would it really be like? Would it live up to my lofty expectations? As the night unfolded, I discovered that the reality of an aurora display is both more and less than I anticipated. Be prepared for the cold, darkness, and potential disappointment, but also for the unparalleled beauty and sense of wonder that will leave you awestruck.
Key Takeaways:
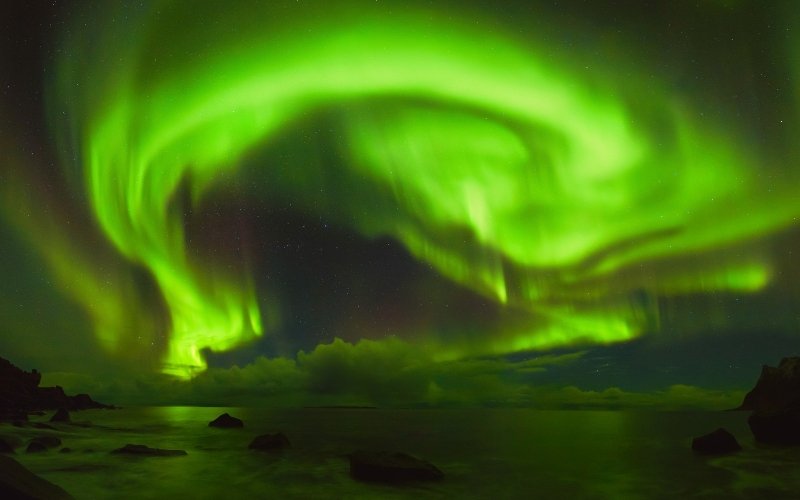
- Aurora Intensity: A real-life aurora display can be much more intense than what’s captured in photos. The lights can be brighter, more vibrant, and dynamic, with rapid movements and changes in color.
- Aurora Sounds: Contrary to popular belief, auroras can make sounds! Witnesses have reported hearing crackling, hissing, or even a low humming noise during intense aurora displays. This phenomenon is still not fully understood, but it adds to the overall immersive experience.
- Atmospheric Conditions: The quality of an aurora display is heavily dependent on atmospheric conditions. Clear skies, low moonlight, and high solar activity can enhance the viewing experience, while cloud cover, moon glare, or geomagnetic storms can diminish it. Understanding these factors can help you plan and prepare for an optimal aurora-watching experience.
Understanding Aurora Types
Your journey to witness the breathtaking display of the aurora begins with understanding the different types of aurora that exist. As I investigated deeper into the world of aurora, I realized that there’s more to it than just the Northern Lights.
Here’s a breakdown of the main aurora types:
| Type | Description |
| Northern Lights (Aurora Borealis) | Occurs in the Northern Hemisphere, typically at high latitudes |
| Southern Lights (Aurora Australis) | Occurs in the Southern Hemisphere, typically at high latitudes |
| Other Rare Aurora Types | Includes aurora-like phenomena such as airglow and light pillars |
Any attempt to understand aurora types would be incomplete without exploring each of these categories further.
Northern Lights (Aurora Borealis)
Borealis, the goddess of the north wind, would be proud of the mesmerizing display of colors that dance across the night sky. The Northern Lights, also known as Aurora Borealis, are the most commonly observed aurora type, visible in the Northern Hemisphere.
Southern Lights (Aurora Australis)
Any enthusiast of the aurora would be thrilled to know that there’s a lesser-known counterpart to the Northern Lights. The Southern Lights, or Aurora Australis, put on a show in the Southern Hemisphere, although they are much rarer due to the limited landmass.
Aurora Australis is often overlooked, but it’s just as breathtaking as its northern counterpart. The best places to witness this phenomenon include Antarctica, Australia, New Zealand, and parts of South America and Africa.
Other Rare Aurora Types
If you thought the Northern and Southern Lights were the only aurora types, think again. There are other rare and fascinating phenomena that are often mistaken for aurora.
- Airglow: a faint emission of light by atoms and molecules in the atmosphere
- Light Pillars: columns of light that appear to extend from the horizon to the sky
- Steve: a purple streak of light that appears in the sky
- Proton Arcs: bright, narrow streaks of light that appear in the sky
- Diffuse Aurorae: a faint, diffuse glow in the sky
Knowing these rare aurora types will help you appreciate the complexity and beauty of the aurora phenomenon.
| Type | Description |
| Airglow | Faint emission of light by atoms and molecules in the atmosphere |
| Light Pillars | Columns of light that appear to extend from the horizon to the sky |
| Steve | Purple streak of light that appears in the sky |
| Proton Arcs | Bright, narrow streaks of light that appear in the sky |
To truly appreciate the beauty of the aurora, it’s imperative to understand the different types that exist. By recognizing these variations, you’ll be better equipped to plan your aurora-watching adventure and make the most of your experience.
Tips for Witnessing an Aurora Display
There’s nothing quite like experiencing the breathtaking beauty of an aurora display firsthand. To make the most of this unforgettable experience, I’ve compiled some important tips to help you prepare and make the most of your aurora adventure.
- Dress warmly, as it can get very cold while waiting for and viewing the aurora.
- Bring a camera with a tripod to capture stunning photos.
- Find a dark location with minimal light pollution for optimal viewing.
- Be patient, as aurora displays can be unpredictable and may take time to appear.
The key to a successful aurora-viewing experience lies in being prepared and flexible.
Best Locations for Viewing
While some destinations are renowned for their aurora displays, I’ve found that remote areas with minimal light pollution offer the best viewing experiences. Look for locations with low population density and limited artificial lighting, such as national parks or rural areas.
Ideal Time of Year and Weather Conditions
The peak Aurora season for best displays typically occurs around the equinoxes in March and September, when the nights are darkest and the aurora activity is highest. Clear skies and a new moon also increase your chances of witnessing a spectacular display.
Another important factor to consider is the level of solar activity, which can affect the frequency and intensity of aurora displays. Keep an eye on aurora forecasts and try to plan your viewing during periods of high solar activity.
Camera Settings for Capturing the Perfect Shot
Little things like camera settings can make a big difference in capturing the perfect shot of an aurora display. I recommend using a wide-angle lens, setting your camera to manual mode, and adjusting the ISO and shutter speed to accommodate the low light conditions.
Perfect your camera settings by experimenting with different exposures and compositions to capture the vibrant colors and dynamic movements of the aurora.
Safety Precautions and Essentials to Bring
Shot in the dark, literally! Don’t forget to bring important items like a flashlight, warm clothing, and snacks to keep you comfortable during your aurora-viewing adventure.
It’s also crucial to prioritize your safety by choosing a safe viewing location, avoiding slippery or uneven terrain, and staying alert and awake during the late-night viewing hours. Be aware of your surroundings and take necessary precautions to ensure a safe and enjoyable experience.
A Step-by-Step Guide to Preparing for an Aurora Display
Unlike a typical vacation, preparing for an aurora display requires some extra planning and preparation to ensure you get the most out of this breathtaking experience. Here’s a breakdown of what you need to do:
| Step | Description |
|---|---|
| 1. Research and Plan Your Trip | Determine the best time and location for viewing the aurora, and book your travel and accommodations accordingly. |
| 2. Pack the Right Gear and Clothing | Bring warm clothing, a camera, tripod, and other necessary items to capture the moment. |
| 3. Find a Dark Location with Minimal Light Pollution | Identify a location with minimal artificial lighting to maximize your chances of seeing the aurora. |
| 4. Set Up Your Camera and Equipment | Configure your camera settings and equipment to capture high-quality photos of the aurora. |
Researching and Planning Your Trip
On the hunt for the perfect aurora display, I always start by researching the best locations and times to see this natural phenomenon. I use online resources and aurora forecasting tools to determine when and where the aurora will be most active.
Packing the Right Gear and Clothing
An necessary part of preparing for an aurora display is packing the right gear and clothing. I make sure to bring warm, layered clothing, as well as a hat, gloves, and scarf to keep me cozy during the long hours of waiting.
With the right gear, I can focus on capturing the moment. I always bring a camera with a tripod, extra batteries, and a remote shutter release to minimize camera shake. Additionally, I pack snacks, water, and a first-aid kit to ensure I’m prepared for any situation.
Finding a Dark Location with Minimal Light Pollution
With the right gear in hand, it’s time to find a dark location with minimal light pollution. I use online resources and maps to identify areas with minimal artificial lighting, increasing my chances of seeing the aurora in all its glory.
Pollution from city lights can greatly diminish the visibility of the aurora, so it’s crucial to find a spot far from urban areas. I always scout out my location beforehand to ensure it’s dark enough and has an unobstructed view of the horizon.
Setting Up Your Camera and Equipment
Light is fleeting when it comes to the aurora, so it’s necessary to have your camera and equipment set up and ready to go. I configure my camera settings to capture the highest quality photos possible, using a low ISO, wide aperture, and slow shutter speed.
Preparing for the shot, I make sure my tripod is sturdy and my camera is securely attached. I also set up my remote shutter release and take a few test shots to ensure everything is working properly. Remember to turn off your camera’s autofocus and instead use manual focus to ensure a sharp image.
I hope this guide helps you prepare for an unforgettable aurora display experience!
Factors Affecting Aurora Visibility
After witnessing the breathtaking display of the aurora borealis, I realized that there’s more to it than just being at the right place at the right time. Several factors come into play to affect the visibility of this natural phenomenon. Here are some of the key factors to consider:
- Solar Activity and the Kp Index
- Cloud Cover and Moon Phase
- Geomagnetic Storms and Their Impact
- Altitude and Latitude Effects
Solar Activity and the Kp Index
Factors like solar flares and coronal mass ejections can increase the chances of an intense aurora display. The Kp index, which measures the auroral activity, can help you predict the likelihood of a spectacular show.
Cloud Cover and Moon Phase
With clear skies and a new moon, you’re more likely to witness a stunning aurora display. Clouds and a full moon can obstruct your view, making it difficult to see the aurora.
The presence of clouds can be a major obstacle in viewing the aurora. Even thin clouds can reflect the light of the aurora, making it appear dimmer. Additionally, a full moon can make the sky brighter, making it harder to see the faint lights of the aurora.
Geomagnetic Storms and Their Impact
There’s a strong correlation between geomagnetic storms and intense aurora displays. These storms can cause the aurora to be more active and visible at lower latitudes.
Geomagnetic storms can be dangerous to our technological infrastructure, but they can also bring about an intense and breathtaking aurora display. During these storms, the aurora can be visible at lower latitudes, making it a rare opportunity for those who don’t live near the poles.
Altitude and Latitude Effects
Now, when it comes to altitude and latitude, being at a higher altitude and closer to the poles can increase your chances of witnessing an aurora display.
Plus, being at a higher altitude can reduce the amount of atmospheric interference, allowing you to see the aurora more clearly. Additionally, locations near the poles have a better view of the aurora due to the Earth’s magnetic field, making them ideal spots for aurora sightings.
Thou shall not forget to consider these factors when planning your aurora adventure, for they can make all the difference between a mediocre display and a truly unforgettable experience.
Pros and Cons of Witnessing an Aurora Display
Not everyone may be aware of the realities of witnessing an aurora display in person. As someone who has had the privilege of experiencing it, I want to share my honest assessment of the pros and cons.
| Pros | Cons |
|---|---|
| Unforgettable experience and breathtaking views | Potential discomforts and challenges |
| Unique opportunity to connect with nature | Cost and time commitment |
| Chance to capture stunning photos | Environmental impact and responsible tourism concerns |
| Personal growth and sense of accomplishment | Possibility of bad weather conditions |
| Meeting like-minded people and making new friends | Limited accessibility and remote locations |
| Increased appreciation for science and astronomy | Risk of disappointment if aurora is not visible |
| Memories that will last a lifetime | Possibility of feeling overwhelmed or anxious |
| Opportunity to learn about local culture and history | Language barriers and cultural differences |
| Feeling a sense of wonder and awe | Physical demands of traveling and staying up late |
Unforgettable Experience and Breathtaking Views
Pros like witnessing an unforgettable display of colorful lights dancing across the sky, feeling a deep connection with nature, and capturing stunning photos make the experience truly worthwhile.
Potential Discomforts and Challenges
Aurora chasers often face potential discomforts and challenges, such as standing in freezing temperatures for hours, dealing with cloud cover or bad weather, and navigating remote locations.
Challenges like these can be daunting, but with proper preparation and planning, they can be overcome. It’s vital to research and understand the conditions you’ll be facing and take necessary precautions to ensure a safe and enjoyable experience.
Cost and Time Commitment
Commitment to traveling to a location with high aurora activity, investing time and money in equipment and guides, and dedicating several nights to viewing the aurora can be a significant undertaking.
This commitment requires careful consideration of your budget, schedule, and priorities. However, for those who are passionate about witnessing an aurora display, the cost and time commitment are often well worth it.
Environmental Impact and Responsible Tourism
Aurora tourism can have a significant environmental impact, such as increased carbon emissions from travel, habitat disruption, and waste generation.
Environmental concerns like these highlight the importance of responsible tourism practices, such as choosing eco-friendly accommodations, respecting local regulations, and supporting sustainable tour operators. By being mindful of our impact, we can help preserve the natural beauty of these destinations for future generations.
Enhancing Your Aurora Experience
Now that you know what to expect from a real-life aurora display, it’s time to think about how to make the most of your experience.
Guided Tours and Expert Guides
On my own aurora-chasing adventures, I’ve found that guided tours can be incredibly valuable. Not only do expert guides know the best viewing spots, but they also often have the necessary equipment to enhance your experience, such as camera tripods and thermal blankets.
Accommodations and Amenities for Aurora Chasers
To get the most out of your aurora experience, it’s important to choose accommodations that cater specifically to aurora chasers. Look for hotels or lodges that offer wake-up calls when the aurora is active, or those that have special aurora-viewing packages.
Expert aurora photographers often recommend staying at locations with minimal light pollution, which can greatly enhance your viewing experience. Some hotels even offer special aurora-themed rooms with windows facing north, allowing you to watch the display from the comfort of your own room!
Combining with Other Outdoor Activities
Even if you’re primarily traveling to see the aurora, why not combine your trip with other outdoor activities? Many aurora destinations offer a range of activities, such as hiking, skiing, or dog sledding, which can add an extra layer of excitement to your trip.
For instance, in Lapland, you can combine aurora viewing with snowmobiling or Northern Lights-themed snowshoeing excursions. These activities not only provide an adrenaline rush but also offer a unique perspective on the stunning winter landscapes.
Staying Safe and Healthy During Your Trip
The key to a successful aurora-chasing adventure is staying safe and healthy. Make sure to pack warm clothing, including thermal layers, hats, and gloves, as temperatures can drop quickly in the middle of the night.
Aurora chasing can be physically demanding, especially if you’re traveling to remote locations. Be sure to stay hydrated and bring snacks to keep your energy levels up. Additionally, consider purchasing travel insurance that covers unexpected medical expenses, as medical facilities may be limited in rural areas. Always prioritize your safety and health over getting the perfect shot.
Northern Lights Online Tools: Chasing Aurora Like a Pro
The most useful Northern Lights online tools for a successful Aurora hunt. Are you about to hunt the Northern Lights on your own? Then you will find these resources helpful. If you are trying to see Aurora for the first time we recommend signing up for the Northern Lights Online Course where is explained step-by-step all you need to know to see the Northern Lights in an easy way.
-
Northern Lights essential online tools designed for beginners to help you see Aurora like the handy Aurora Mobile App and Northern Lights Online Course will help you to understand how Aurora works and to monitor real-time activity.
-
The Northern Lights Forecast and Kp index for 3 days and long-term Aurora forecast for up to 27 days ahead can be found here: Geophysical Institute Forecast, NOAA Aurora Forecast, Spaceweatherlive Forecast or in the Northern Lights App.
-
Find the best Aurora spots with the light pollution map and cloud cover prediction.
-
Northern Lights activity in real-time: Real-time Aurora activity (worldwide magnetometers), Solar Wind activity, Sun’s activity, Aurora live Boreal webcams list or Aurora App.
-
Additional resources to know when it will be dark enough Darkness graph & Map and how much the moon will illuminate the sky Moon Phase + Moonrise & Moonset.
-
If you decide to go with professional Aurora hunters here you can find the top-rated Aurora Tours.
- Guides on how to hunt Aurora: Northern Lights Alaska, Northern Lights Canada, Iceland Northern Lights, Norway Northern Lights, Northern Lights Sweden, Finland Northern Lights, Northern Lights Scotland
Summing up
To wrap up, witnessing a real-life aurora display is an experience like no other. I’ve learned that it’s not just about capturing the perfect photo, but about immersing yourself in the moment. From the anticipation to the breathtaking spectacle, every aspect of the experience is worth savoring. As you prepare for your own aurora adventure, remember to dress warmly, be patient, and soak up every second of this natural wonder. With these tips, you’ll be well on your way to creating unforgettable memories under the dancing lights of the aurora.
FAQ
Q: What is the best time to see the aurora borealis?
A: The best time to see the aurora borealis, also known as the northern lights, depends on the location and time of year. Generally, the aurora is most active around the equinoxes in March and September, and the best viewing times are between 11 pm and 2 am when the sky is darkest. However, it’s crucial to check aurora forecasts and be prepared to stay up late or wake up early, as the displays can occur at any time. Additionally, consider traveling to locations with low light pollution and clear skies, such as Alaska, Canada, Norway, or Iceland, for the best viewing experiences.
Q: What are the different colors of the aurora, and what do they mean?
A: The aurora borealis can display a range of colors, including green, blue, pink, red, and even purple. The colors are determined by the energy level of the solar winds and the altitude at which they collide with the Earth’s atmosphere. Green is the most common color, produced by collisions at altitudes of around 100-200 km. Red is produced by higher-energy collisions at altitudes above 200 km, while blue and violet are produced by lower-energy collisions at altitudes below 100 km. Pink and purple hues can appear when the aurora is particularly intense. While the colors can be breathtakingly beautiful, they don’t necessarily indicate the intensity or frequency of the aurora.
Q: Can I take good photos of the aurora with my smartphone?
A: While it’s possible to take decent photos of the aurora with a smartphone, the results may vary depending on the device and settings. To increase your chances of capturing stunning photos, consider the following tips: use a tripod to stabilize your phone, set the camera to manual mode or night mode, and adjust the exposure settings to 10-30 seconds. You may also want to use a remote shutter release or the phone’s self-timer to minimize camera shake. Additionally, consider using a camera app that allows manual focus and ISO adjustments. However, keep in mind that even with the best equipment, capturing the aurora’s movement and vibrancy can be challenging, and it’s crucial to enjoy the experience and not get too caught up in taking photos.